Friday, March 31, 2006

Onion Masala Pakoda


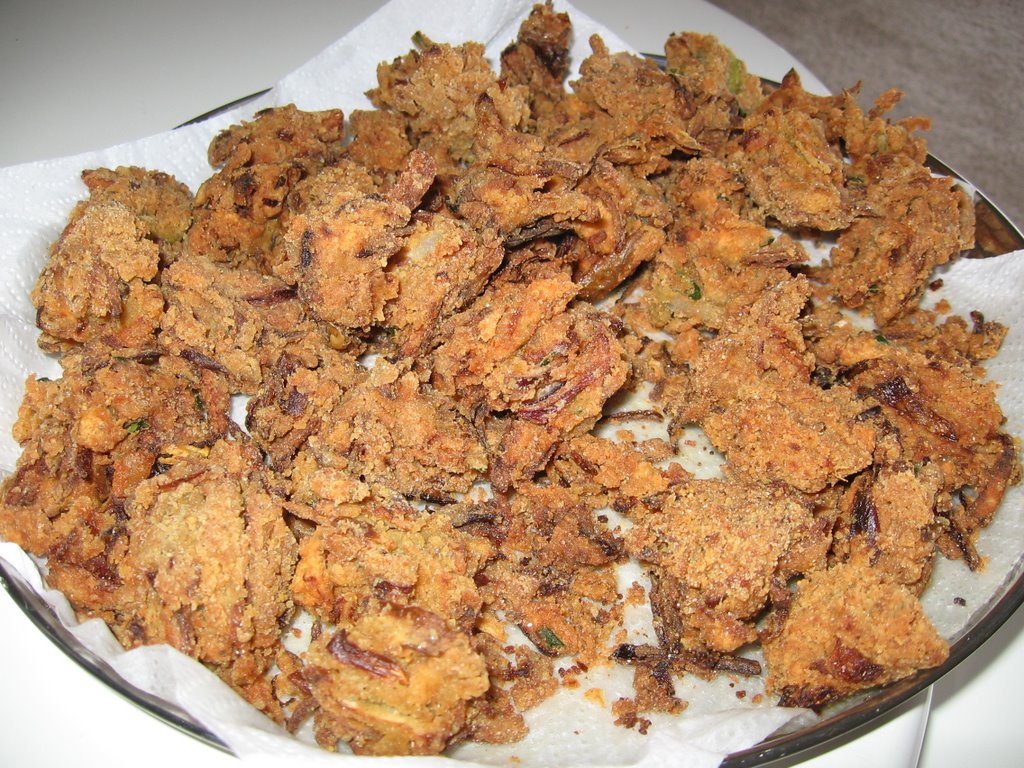
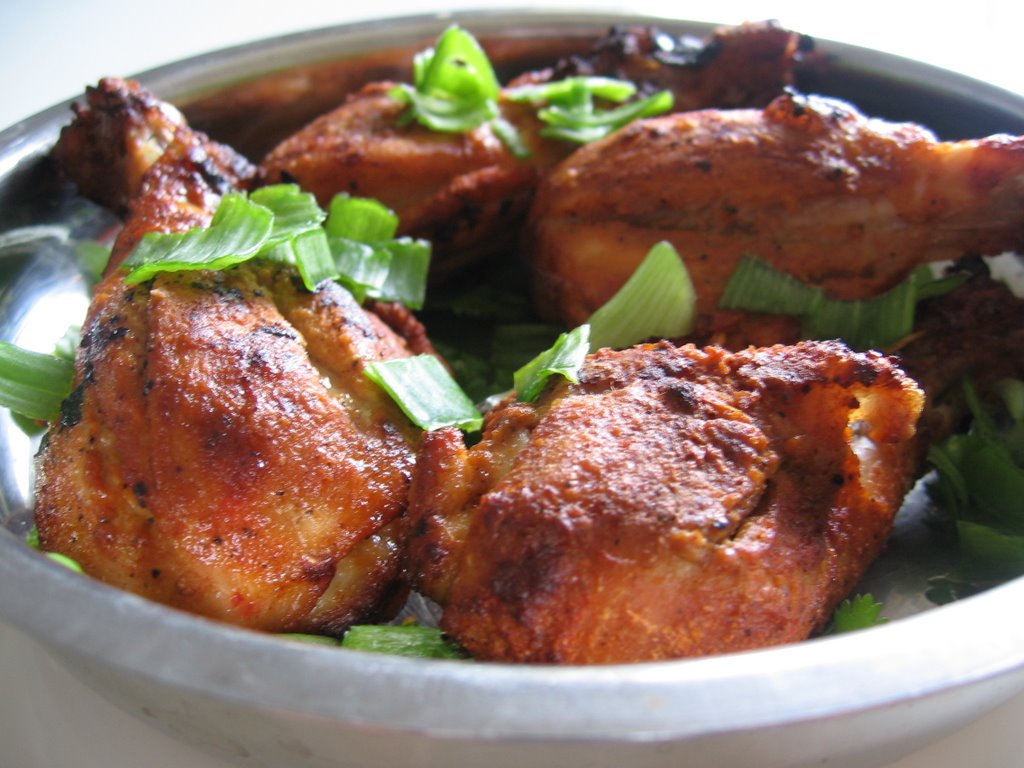
Here is an another receipe for a deadly appetizer.
There is no grinding or over work involved.All you need to do is cut up some Onions.
You cannot keep you hands of this pakoda while you are cooking it.
The smell of this wonderful snack will fill your house and also your neighbourhood.
I got this receipe from HemantsCookery corner. I love his receipes and have tried quite a few.But this one is a classic. You should definitely try it and you will not be disappointed.

Whenever I make the pakados I would always save some and make pakoda kulambhu the next day.Its nothing but the pakodas soaked in pulikulambhu, another delicacy learned from my mom.I will try to post the receipe for this one too later

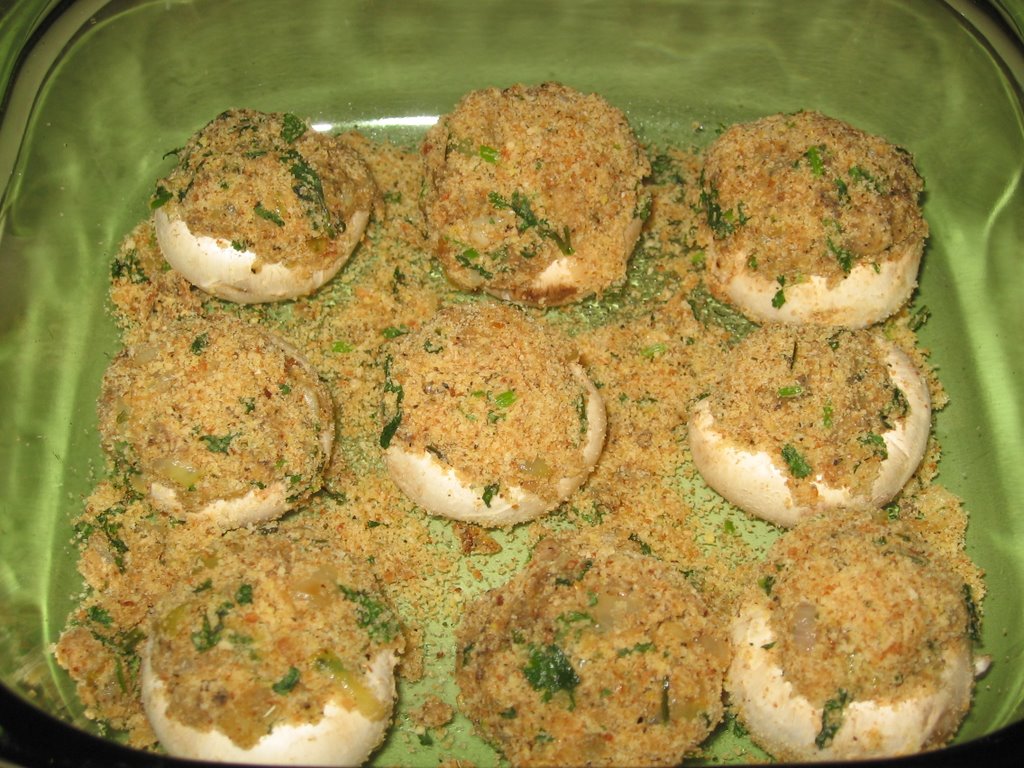
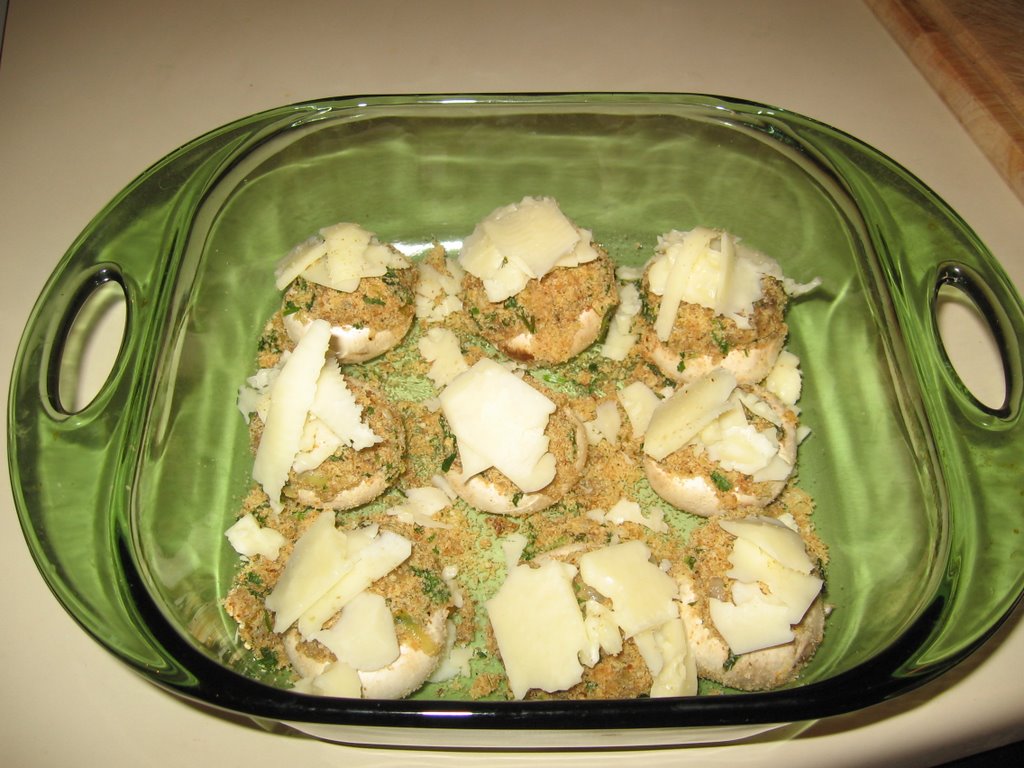
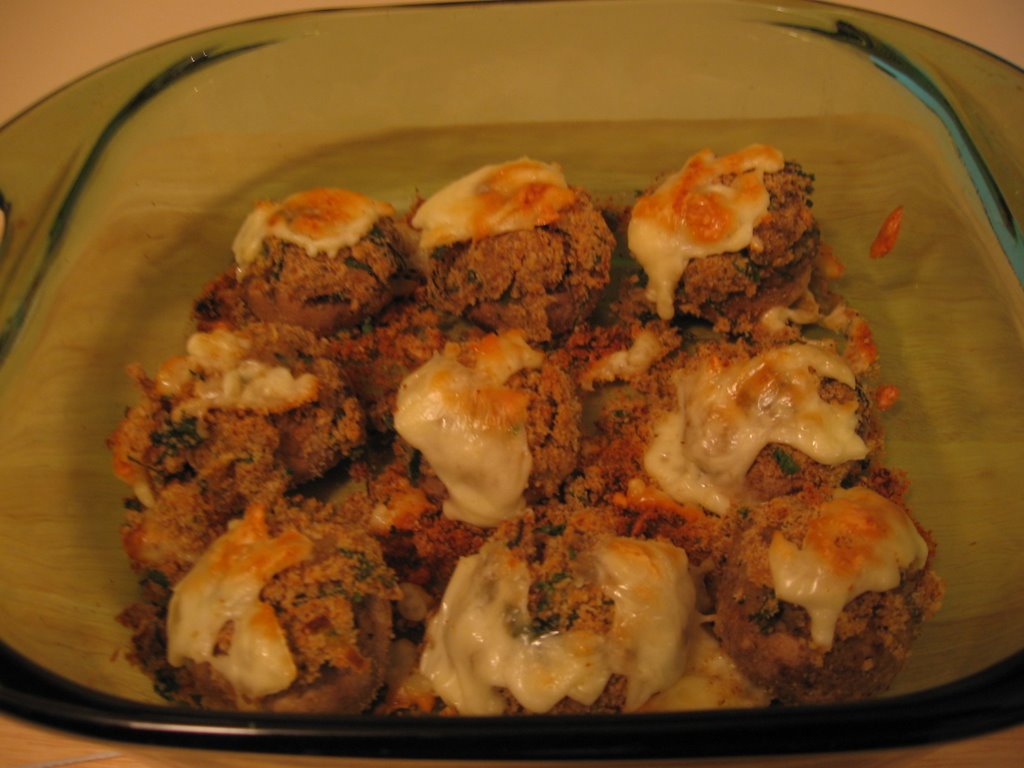
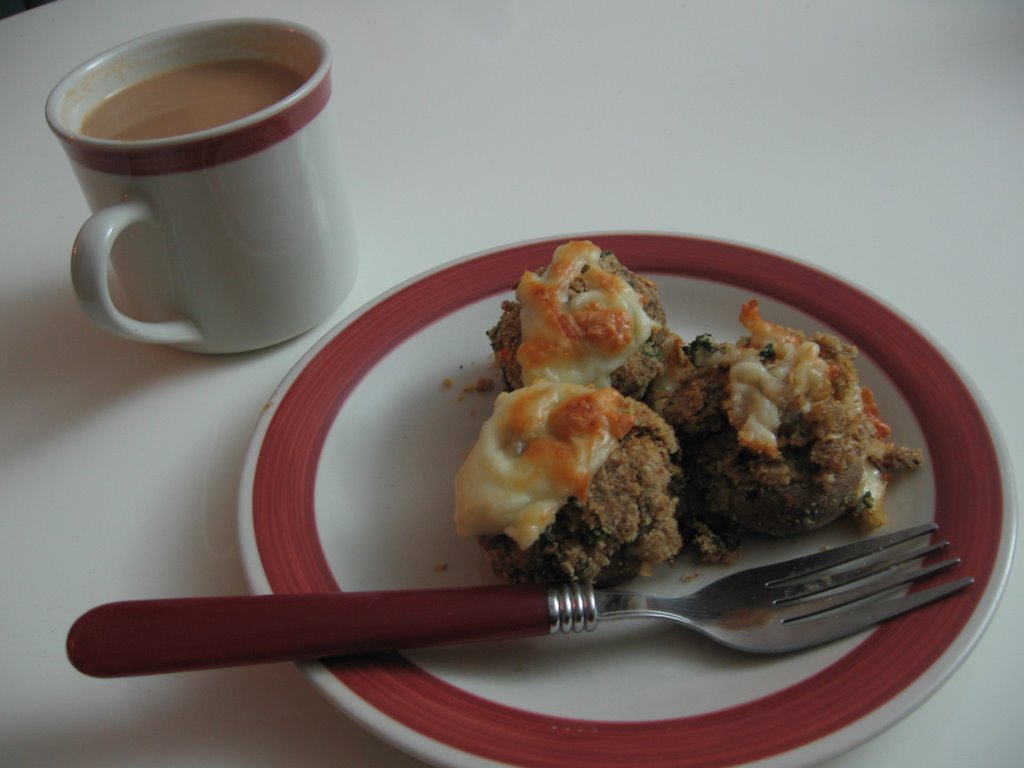
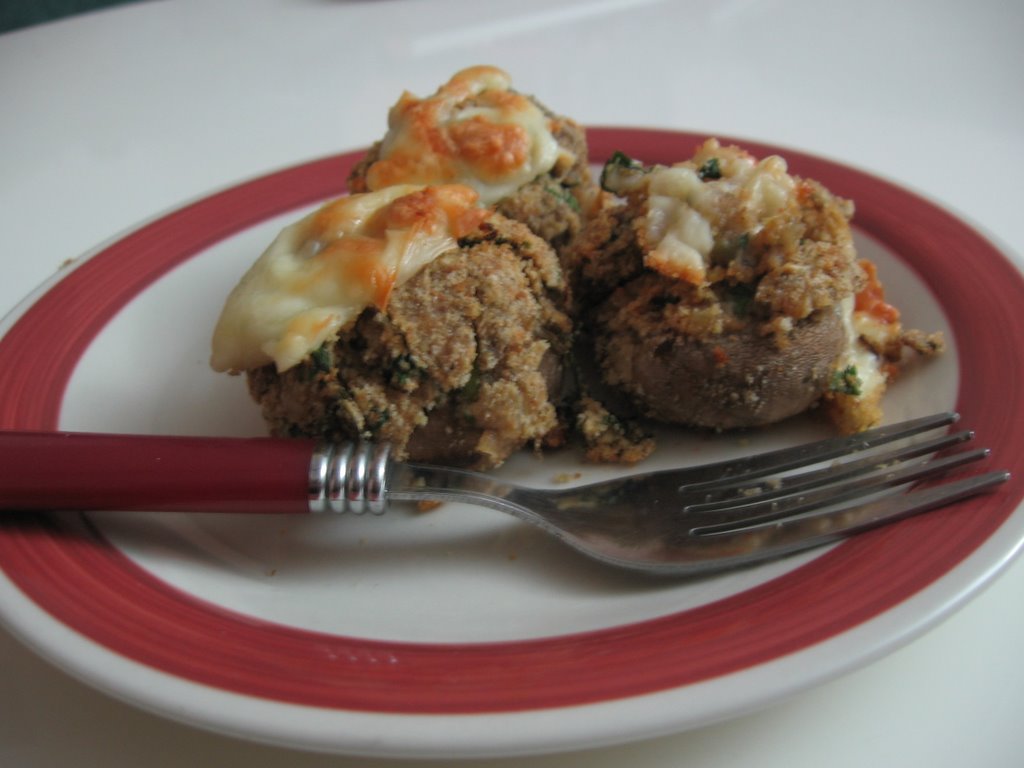
Since the rules for the VCC event from 'My Dhaba' has been changed to "upto three receipes per participant" I have decided why not send this receipe to that as a second entry.My first entry for this event is stuffed mushroom.

Ingredients:

1 cup Besan flour (kadalai mavu)
1 cup rice flour
1 tsp chilli powder.
1/4 tsp cooking soda
1/2 tsp salt
2 tsp chopped garlic
2 tsp chopped ginger
2 tsp chopped green chillies
2 tsp chopped curry leaves
1 tsp ghee (optional)
2 medium sized onion sliced into thin strips

Method
First take all the dry Ingredients into a bowl and mix well with your hands.
now add the garlic, ginger, greenchillies, curry leaves, ghee (op), onions and mix well
heat the oil in a kadhai.Now divide the flour mixture into four portions.
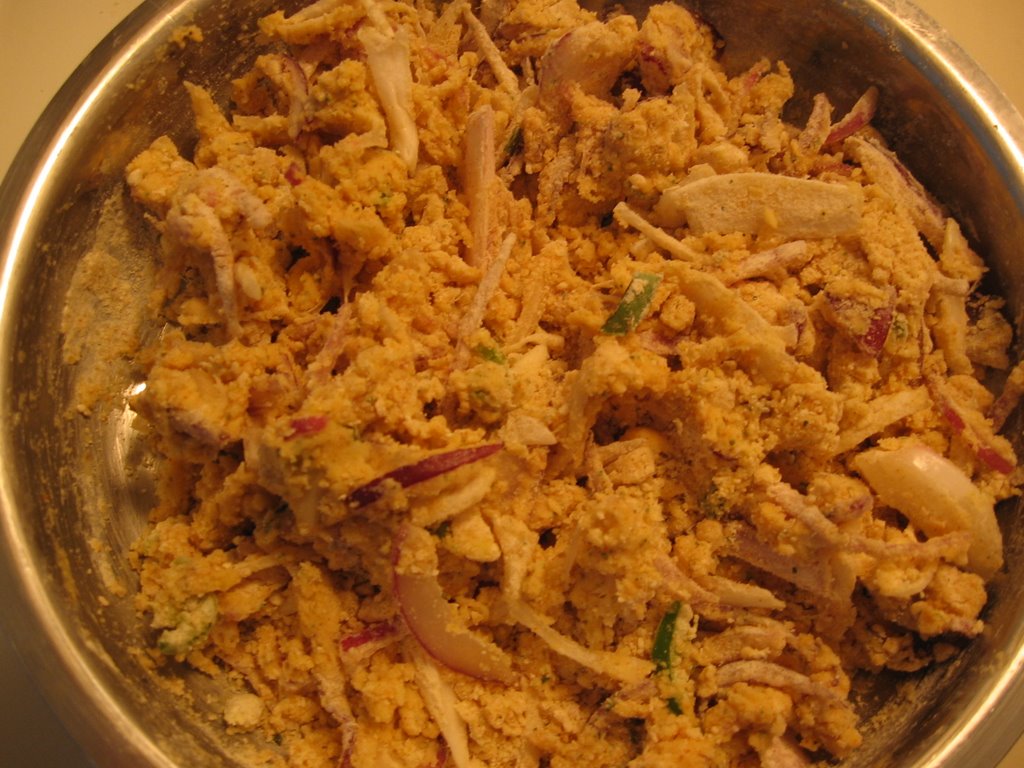
Take one portion into a plate.Sprinkle some water and then mix it slightly with your hand.It should not become soggy.The consistency should be as in the picture.

Take some flour in ur fingers and press it slightly and drop it in the oil.You can add 4 - 5 pakodas at a time.It should not have any particular shape.Fry until golden brown, take it out and drain in the paper towel.
Continue the same with the other batches of the flour.


Note:
If you add/sprinkle water to the whole batch, the flour will soak up the water and the pakodas will not be crispy.So always do it in small batches.

Wednesday, March 29, 2006

Its Spring Time


We have a beautiful lake in front of our apartment.I get a nice view of it from my balcony.Everyday I spent some time watching the activities on the lake.For the past few months the lake was pretty quite and it was covered with snow.But the spring has officially started, last two weeks the lake has become alive with lot of activities.All the migrated canadian goose has returned back.

Each day Iam discovering some new birds.I have put a bird feeder in my balcony, so that I can attract some of the birds and take some pictures.


Still the weather does not permit me to go out and spend my time in the free air.But I do it occasionally for 5 mins(thats it) everyday.


Last week I noticed a goose sitting under a tree for a long time.Me and my husband thought that it might be sick, as we always see them swimming and flying around.After my Husband left to office, I sat by my balcony with a book, and cup of tea.Suddenly I saw the bird get up and I was very thrilled to see some eggs under neath.I ran for my camera to capture it.


It was very thrilling and exciting to see the mommy bird cover up the nest carefully, and I could not even see spot of the nest afterwards.
After that day, both mommy and daddy bird spend some time periodically near the nest.While the female bird incubates the nest, the male bird safeguards the area by walking around the place, swimming around tha area.


Its absolutely fascinating to watch how protective these young parents are. I wanted to share this with all of you , so Iam posting the pictures also.I researched in the net and found that it will take 23 days for the eggs to hatch.Iam counting my days to see the new baby birds.I will periodically post the pictures about how the birds are doing.


The anxious Mommy Goose

Do send in your comments and thoughts about this post.
Do u find any such activities in your neighbourhood??

Monday, March 27, 2006

Tandoori Chicken


Tandoori Chicken

This Weekend was very normal and not a very busy one for us.We spend most of the time at home, watching movies , and having nice food. Since I had lot of time this weekend , I decided to cook by long time favorite food - Tandoori chicken.
This is one dish I love to eat whenever I visit the Indian restaurants over here.
I retained the name Tandoori, though I used the regular oven to roast the chicken, may be I should have called this receipe 'Roast chicken'...nahhhh somehow I like the name 'Tandoori chicken'.Anyway its very easy to make and its a great party food, without consuming much of your time.

Ingredients:

4 chicken drumsticks
1 tsp chilli powder
1/4 tsp coriander powder
1/2 tsp of garam masala
1 tsp of ginger garlic paste
3 tsp of curd/yogurt
2 tsp lemon/lime juice
1 tsp of pepper powder
1 tsp of jeera powder
1 pinch of red food clour (optional)
green onions for garnishing
salt to taste

Method:
Remove the skin from the drumsticks and wash throughly and drain
add all the ingredients and mix well.you can mix all the ingredients first, check for salt and spice level and then add the chicken and stir well to coat.
marinate the chicken overnight.The minimum time to marinate is 1 hour.
When u r ready to bake, preheat the oven to 350C
Cover the baking tray with aluminum foil, spray with pam cooking oil.
place the chicken within 1 inch apart and then place the tray in the preheated oven.
Bake for 15 mins. Now take out the tray and flip the chicken pieces using a tong and then bake again for 15 mins.
Now take the tray out flip the chicken again and set the oven settings to Broil.
Allow it to broil for 5 mins, or until you get a nice golden red colour.
But be careful, if you keep in broil for a long time the chicken will get burnt.
Garnish with cilantro and spring onions.

Friday, March 24, 2006

Stuffed Mushrooms - VCC:VCC - Q1 2006


Iam Posting this Receipe for "Virtual Cooking Competition" conducted by VKN of My Dhaba

This is a very interesting receipe and it does not require as much effort as it looks.
It was almost 5 years backwhen I first ate this appetizer dish in Olive gardens.It was so creamy and bubbling with cheese I absolutely fell in love with the mushrooms.As soon as I came home I started looking for the receipe in the internet.But I got so many versions of this receipe I got very confused and decided to stick to the simplest version from a library book..From that day onwards this is my special appetizer for any party or a potluck and it has always been well receivedand appreciated.

Ingredients:
1 Packet large white Button Mushrooms(about 12)
8 cloves of garlic finely chopped
1 medium sized onions fineled minced
2tbl sp Butter
1 cup of shredded mozarella cheese
1 cup of shredded parmesan cheese.
2 cups bread crumbs.

Method:
Preheat the Oven to 350C
Wipe the Mushrooms with a damp towel and scoop out the center of the mushrooms, and make it like a hollow cup(like in the picture)
Chop the scooped out mushroom stems.
Add the butter in a heated pan, add the garlic and the onion saute well.
add the chopped musroom stems and saute well.Add some salt and pepper
Now add the bread crumbs and mix well for 2 mins and allow it to cool.


Stuff the hollow mushrooms with this mixture and arrange it on baking tray.
Sprinle the cheeses over the stuffed mushrooms.


Place it in the oven and bake it for 20 mins, or until the cheese is bubbling and turns golden.
Serve it hot.


Note: I have gone easy on the cheese as you see in the pictures, but beleive me ,more the cheese the more the taste . So go ahead add sprinkle more cheese, and have fun for a day.

Enjoy with hot cup of tea!!!


Updated with some recent pictures.

Tuesday, March 21, 2006

Banana Nut bread


Banana Nut Bread

Its Baking Time this weekend.Its been a long time since I baked something.
When I first came here to US, I was very excited to see the ovens in the apartment, which motivated me to try baking.To start with I used all the store bought cake mixes, which came out wonderfully.How many ever time you bake, the excitement to see your final product is always the same...Dont you all agree....
One of my collegue Invited me to her sons birthday party.She had baked a nice and delicious cake, when I asked about the receipe, she told me that it was a Banana bread receipe without a egg.Since they were Jains, they didnt want to buy cake from the stores.But their cake was very soft and it was a hit. So I got the original Banana bread receipe from her and started experimenting with it by adding an egg, it turned out good.

Nowadays I make it atleast once in a month for ourselves or as a nice gesture for friends when they invite us over for dinner.
Last week we had India - Pakistan one day match, and one of our friends invited us over to watch the overnight match.It sounded fun, so I decided to bake the Banana bread for some midnight snacking.

Ingredients.

2 cups all purpose flour
1 egg
1/2 stick butter
1 cup sugar. ( I used only 3/4 cup as I wanted to cut down on sugar)
2 Rippened bananas
3 tblsp milk
1 tsp baking powder
1/2 tsp baking soda
1/4 tsp salt
1 cup chopped walnuts
1/4 tsp vanilla essence or powder

Method:

Preheat the Oven to 350F/180C
Mix in the butter and sugar.Beat till smooth and frothy.
Sieve the flour and baking powder, soda, and salt mixture three times.
Mash the bananas well with the back of the fork
Beat the egg seperatly and add it to the butter mixture little by little, while mixing simultaneously.Add the flour mixture and mix well.The mixture will be very thick at this stage, add the milk now and mix well.Fold in the bananas at this stage and mix well.
Now add half of the chopped walnuts.
Greese the baking tray with butter, dust it with some flour.
Pour in the mixture and place it in the preheated oven.
Sprinkle the remaining walnuts over the spread.
Bake for 45 -50 mins.The time can vary depending on the oven.So check periodically after 40 mins .a knife or toothpick inserted in the middle should come clean.

You can Enjoy this bread as breakfast or a snack along with tea.
Happy Baking.

Sepangkilangu / Arbi/ Colacasia Fry


Sepangkilanghu (Colacasia) Fry

This is a very nice receipe from my MIL.We get Sepangkilanghu through out the year in all the Indian stores over here.Initially when I started to cook this vegetable, I will make it soggy, or  will not be cooked properly.So I will always use this in my puli kulambhu which is also tasty , but still I would always the miss the crispy fry that my mom would make.
When I was in India last year I learned this simple easy to make receipe from my MIL.

Here you go:

Ingredients:
2 medium sized sepangkilanghu
1 tsp chilli powder.
1 tsp sombhu powder.
salt as needed.

Method:
Cook the sepangkilanghu covered for about 15 mins.Check periodically, to see if its cooked, otherwise it will become soggy.Alternatively you can poke the kilanghu with a fork/knife and cook in the microwave for 5 mins, depending on the power settings.
Update :Alternatly cook the vegetable in a pressure cooker for 1 whistle or 10 mins with salt and tamarind(optional) as mentioned in the comment below.

Now peel the skin and cut into round slices.Add the chilli powder, sombhu powder and salt and mix to coat all the pieces evenly.leave it for 15 mins.
Take 2 tsps of oil in a pan.rotate the pan to spread the oil evenly .Now add the kilanghu pieces and stir lightly to coat with oil.Reduce the flame to medium heat and allow it to fry, stirring occasionally.stir till it becomes crispy on the outside. You can add more oil if you want.
You can also sprinkle a tsp of gramdhal (kadalai mavu)powder and fry to make it extra crispy
Is an excellent side dish for mor kulambhu.

Updated with latest picture:

Friday, March 17, 2006

Broccoli Kootu - From My Rasoi#4 - March, Fusion


From My Rasoi #4 - Fusion.
Broccoli Kootu:

Though I am learning new things everyday to upgrade my Blog in all possible ways, I have decided to take my blog to one step higher by participating in the From My Rasoi event conducted by Meena of Hooked on Heat.
This is one of the Blogs which inspired me greatly when I used to be hooked on to the internet surfing through the blogs.I completely read through the write up given by Meena for the last months event Cooking with Love and have also tried some of the receipes.
Hence my decision to participate in this months event.

Coming to the topic , its a great way to bring us aside from our conventional cooking and put some thought and time into something new. Hey ..thats how great receipes are created right!!
My Receipe for this event is "Broccoli Kootu".Ya... I here some of you sighing and saying "no broccoli", but beleive me its a great vegetable when cooked right.
When I first came to US , I used to hate this vegetable like anything, I dont know why may be the colour or the texture.But when I started eating out and started trying different cuisines I could not miss the fact that broccoli is used in most of the dishes. One day on my husbands compulsion I started tasting this vegetable and to my surprise it was great.Thus my affinity towards broccoli started growing. So When I saw the event's topic on Meena's blog, I could not start thinking anything else but Broccoli.This receipe has been a huge hit in my house.Nowadays we are making this atleast once a week.Here you go...Enjoy and send in ur comments.

Broccoli Kootu:

Ingredients:
2 medium sized Broccoli crowns.
1 medium size onion
1 medium size tomato
1 tsp chilli powder.
1/2 tsp turmeric powder
1/2 cup moong dhal.(yellow split dhal)

for tempering:
1 tsp mustard, 1 tsp cumin, 1 tsp urad dhal.

Note: Broccoli is very delicate, so it should not be over cooked.

Method:
Cut the broccoli into bite sized florets.
First cook the moong dhal, so that its not over cooked.It should be partially cooked(like sundal).
Now take a tsp of oil in kadai, add the ingredients for tempering.When the seeds pop add the chopped onions and fry well.Now add the broccoli florets(washed and drained) and stir well.
Add turmeric, chilli powder and salt to taste, stir well. Now add the chopped tomatoes over the broccoli, do not stir, close the pan with lid and allow the vegetable to cook in low flame for 5 mins.If you stir after adding the tomatoes it will become mushy. Now open the lid and add the cooked moong dhal and stir well.Allow it to cook for 3 mins and switch of the stove.

Sometimes I just eat the whole bowl of this dish by itself for dinner. Hope u all enjoy too.

Thursday, March 16, 2006

Wheat Rava Kitchadi


Wheat Rava Kichadi.

We usually take light dinner, avoiding high caloric food.
One of the best and simple dish we always opt for is wheat rava upuma.My husband loves upuma of any kind except vermicelli uppuma(I dont know why). So Uppuma is an easy way for me to fix up a dinner quickly.
As a child I used to hate anything made using the wheat rava even sweets made using this like pongal or kesari.But then my taste buds changed after marriage, as we have wheat rava upuma atleast twice a week in my in-laws place. Slowly I started developing a liking to this dish, but not as much as Rava upuma or Rava kichadi.
So today I decided to to kick it up a notch(Emeril's style) by adding lots of vegetable and make it as a kichadi. My Husband loved this dish and it was very wholesome. And you know what its a great way to include broccoli in your diet. I served this with coriander- curry leaves chutney

Ingredients:

Wheat Rava 1 cup.
2 1/2 cup of water. (2 cup for - rava, 1/2 cup for vegetables)
Vegetables - Broccoli 10 spears,
1 Carrot cut in to round slices
1/2 cup peas.
1/2 cup capsicum.
you can add any other vegetables of your choice.
1 medium sixed onion slices thin.
1 medium sized tomato.
1 tsp choopped garlic
1 tsp chopped ginger
3 green chillies sliced verically


for tempering:
1 tsp musard, urad dhal, few curry leaves.

Method:

Fry the wheat rava in a tava until slight brown and keep aside.
In the same fry the brocolli spears in a drop of oil.Just stir them up in high heat for 2 minutes and keep that aside.
Take 2 tsp of oil in kadai/pan add mustard , urad dhal and curry leaves.
After the seeds pop, add the ginger , garlic and green chillies.
Then add the onioins and fry till translucent, now add the tomatoes and fry well.
now add all the vegetables except the broccoli. , a pinch of turmeric and salt. fry well till the vegetables are tender.Now add the water, close the pan and allow it to boil for few minutes.
Now add the whea rava and stil till it mixes well with the water and there are no lumps.
Reduce the heat to low, add the broccoli pieces, close the pan and allow to cook in low heat for 10 mins or till completely cooked. Add chopped Coriander leaves.

Wednesday, March 08, 2006


Fish Curry using Canned Salmon
We have decided to include more fish in our regular diet. All Nutritionist and other health websites recommend 3 servings of fish per week.It becomes very difficult to buy and cook fish during the weekdays.So this week I thought of giving canned salmon a try, and the result was not as bad as we thought.It was quite delicious.Morever researchers and analysts say that the canned fish is always better compared to the fresh farm raised ones as the canned fish are canned immediately after they are caught in the wild and later are raised by lots of artificial food which are not very good for health.The only demerit I find in these are the level of sodium, but then I reduce the amount of salt I add to the dish and also rinse the fish well after opening the can. So here you go..A very good receipe for Canned Fish(salmon) which goes well with plain rice and also roti's.
Ingredients:
1 can of Wild Salmon 2 medium size onions, finely chopped.
2 ripe tomatoes, medium sized , finely chopped.
2 tsp finely chopped garlic
2tsp finely chopped ginger. (or u can use 2 tsp of ginger garlic paste).
1 tsp red chilli powder
1tsp coriander powder
1 tsp pepper powder
1 tsp cumin powder
1/2 tsp of turmeric
1/2 tsp of fenugreek powder
1/2 tsp of sombu(fennel powder) - op 1/2 cup chopped coriander leaves

Method:
Heat 2 tsp of olive oil , and add the ginger, garlic and curry leaves , and the add the chopped onions.Fry till translucent and the add the chopped tomatoes.fry well and then add all the dry powders except the fenugreek powder and fry well till the oil seperates. Add two glasses of water , close with a lid and allow it to boil. Now open the can and place the fish piece on a plate and rinse it with cold water.
Take care to not break the fish , as it will be very soft. just gently cut the fish loaf into 4 pieces without breaking. When the curry is boiling and all the masala smells goes,add the fenugreek powder and gently slide the fish pieces into it. close it with lid.after 5 mins open and turn over the fish and allow it to boil another 5 mins.garnish with coriander leaves and switch of the stove.

The fish gets broken into very small pieces, but dont worry, that itself will give the curry a nice taste and texture.Nowadays we have become so addicted to this curry that I have decided to make this curry twice during weekdays and fresh fish during weekend. (Have already stocked up the Pantry).Hope u will enjoy too.


Tuesday, March 07, 2006

Kothavarangai/clusterbeans Paruppu usili


Great, Have successfully created my Blog.
So here you go.............. posting my first receipe.
This is one of my favorite receipe made with cluster beans (kothavarangai).So wanted to start my posting with this.Whenver I get this particular vegetable I will always try this receipe, but in vain.But I was glad to finally make it right this weekend.

Cluster beans paruppu usili:

Ingredients.

cluster beans - chopped into small pieces
one handful of channa dhal (soaked for an hour)
2 red chillies.
1 tsp cumin


for tempering:

1 tsp mustard
1 tsp urad dhal
a pinch of asofoetida
few curry leaves

method:
Steam the chopped vegetables with a pinch of turmeric and salt for 10 mins.I did this process using a pressure cooker(without weight) for 10 mins.
grind the channa dhal, red chillies, and cumin coarsly by sprinkling some water.
In a pan add a tsp of Olive oil, and add the grinded mixture.stir well using the spatula until it becomes crumbly.(like egg scramble).take it away from the stove and cool it.
Parallely in another pan add 1 tsp of olive oil add the tempering ingredients. After the mustard pop and add chopped onion and fry till translucent.Now add the steamed vegetables, cover and cook for 5 mins and then add the channa dhal mixture and stir well for few minutes and switch of the stove.

Enjoy !!!!!!!!!!!


After browsing through numerous blogs for receipes and inspired by the facinating pictures, I have decided to create my own blog.
The purpose of this blog is to document my receipes for years to come and also you know.....to get a nice feeling on seeing the end product of our efforts.....and ofcourse something interesting to do on my free time.
Related Posts with Thumbnails